
WordPress and WooCommerce
Configure product elements and variations
Create reusable product parts, target them with choices, and keep fixed elements editable from the development module.
Guide overview
Before you start
- At least one product view exists.
- The configurable parts and choices are identified.
- Preview media and pricing consequences are prepared.
Expected result
Every product part responds to the intended variation, keeps a stable default, and restores correctly after save or cart editing.
Create and select elements
Elements represent product-owned parts such as backgrounds, panels, product images, meshes, or material targets. They can be deliberately non-selectable on the canvas while remaining accessible through the Elements module.
In development mode, use the selection control in the element list to reposition a previously fixed item without temporarily making it customer-editable.
Create or import the element.
Give it a stable internal name.
Assign it to the relevant view.
Set development and customer selection behavior.
Attach a variation group
A variation group targets one element or property and exposes named choices. Depending on the target, a choice may replace media, toggle visibility, apply a color or material, or contribute a configured amount.
Set one default and keep choice identifiers stable after linking the custom product to commerce products.
Create the variation group.
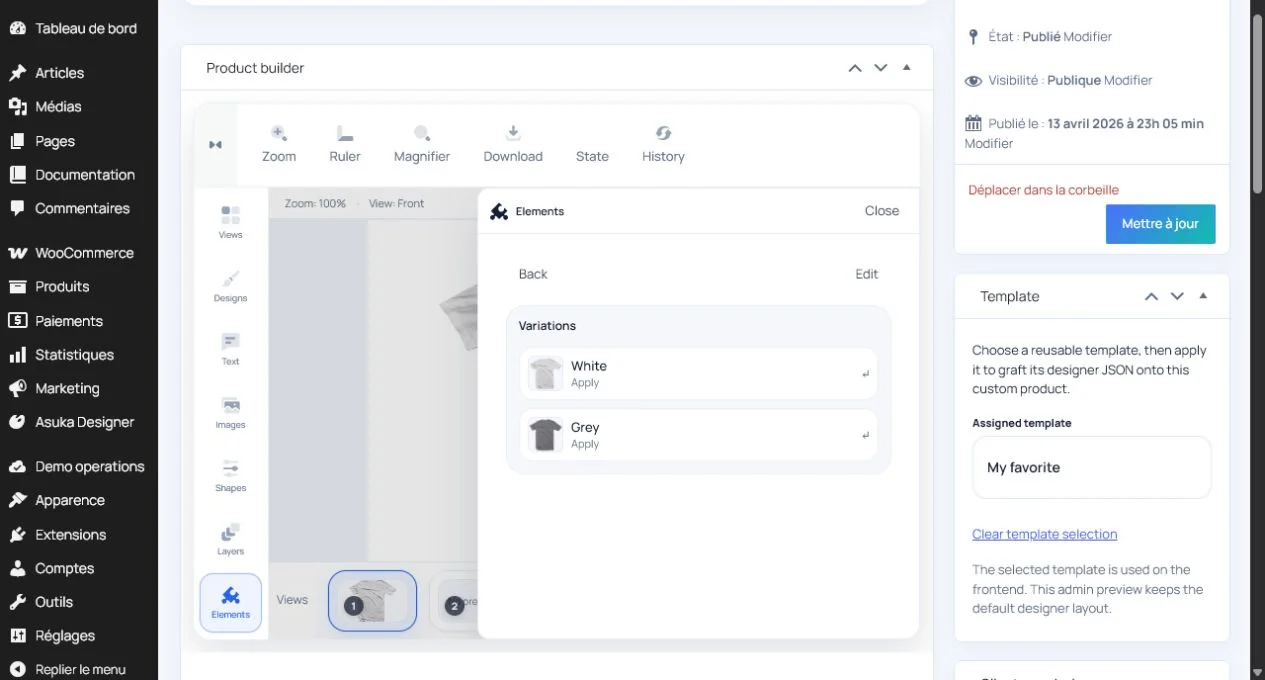
Choose the target element.
Add labels, thumbnails, and values.
Select the default choice.
Test all transitions
Exercise every choice, change views, undo and redo, then save a non-default state. Reopen the product in administration and from a cart line to verify the same choices target the same elements.
When removing a choice, test existing saved designs first so a historical selection has a defined fallback.
Test each choice.
Switch views and use history.
Reload a saved non-default value.
Check price and production metadata.